How To Get Notification Light Effect In Front Camera: In today’s fast-paced world, staying updated with notifications is essential. However, many modern smartphones have done away with the traditional notification LED, leaving users searching for alternative solutions. If you’re one of those users, look no further! The Notification Light – aodNotify app offers a unique and effective way to get a notification light effect using your phone’s front camera. In this guide, we’ll walk you through how to set up and use this app to never miss an important alert again.
What is Notification Light – aodNotify?
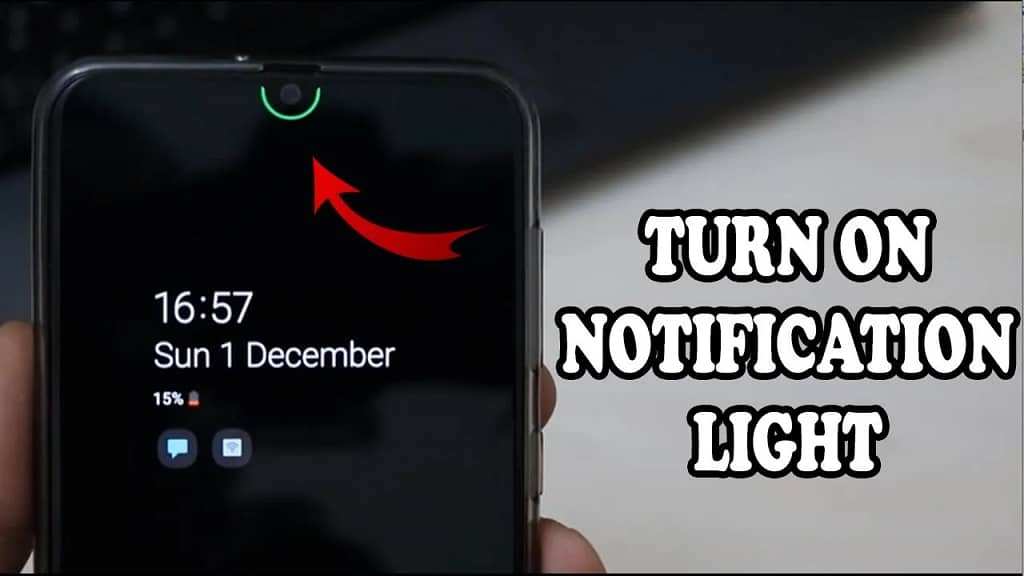
Notification Light – aodNotify is an innovative app designed to provide a customizable notification light effect on Android devices, particularly those without a built-in LED notification light. The app leverages your phone’s Always On Display (AOD) functionality and front camera to create an eye-catching and easily noticeable notification light effect.
Features of aodNotify
- Front Camera Ring Light: The app uses the front camera’s ring to display notifications, making it easy to see alerts even when the phone is lying flat.
- Customizable Effects: You can choose from a variety of light effects and colours to match your style or preferences.
- Battery-Friendly: Designed to have minimal impact on battery life, ensuring your phone stays powered throughout the day.
- Wide Compatibility: Works with a wide range of Android devices, especially those with OLED screens for optimal AOD performance.
How to Set Up Notification Light – aodNotify
Step 1: Download and Install the App
- Open the Google Play Store on your Android device.
- Search for Notification Light – aodNotify.
- Download and install the app by tapping on the Install button.
Step 2: Initial Setup
- Once installed, open the app.
- Grant the necessary permissions, such as Notification Access, Draw Over Other Apps, and Modify System Settings. These permissions are crucial for the app to function correctly.
Step 3: Configure Notification Light Settings
- Enable Notification Light: Toggle the main switch to turn on the notification light feature.
- Choose Light Style: Select the front camera ring as the notification light style.
- Customize Colors and Effects: Go to the customization settings to choose your preferred colours and effects. You can opt for a solid colour, gradient, or even a multi-colour effect.
Step 4: Optimize Battery Usage
- Navigate to the battery optimization settings within the app.
- Ensure that aodNotify is excluded from battery optimization to prevent the system from shutting it down.
Step 5: Test the Notification Light
- Send a test notification to your phone or wait for an incoming message.
- Check to see if the front camera ring light effect is activated. Adjust the settings if necessary to ensure visibility.
Tips for Using aodNotify
- Adjust Brightness: Depending on your environment, you might need to adjust the brightness of the notification light for better visibility.
- Schedule Downtime: Use the app’s scheduling feature to disable notifications during specific hours, such as when you’re sleeping.
- Regular Updates: Keep the app updated to enjoy new features and improvements.
Conclusion
With the Notification Light – aodNotify app, you can bring back the convenience of a notification LED in a modern and customizable way. By using your front camera to display a notification light, you’ll never miss an important message or alert again. Follow our simple guide to set up the app and start enjoying a personalized notification experience today!